Simple Origami Butterflies

Origami Butterflies How To Make A Paper Butterfly Easy Origami
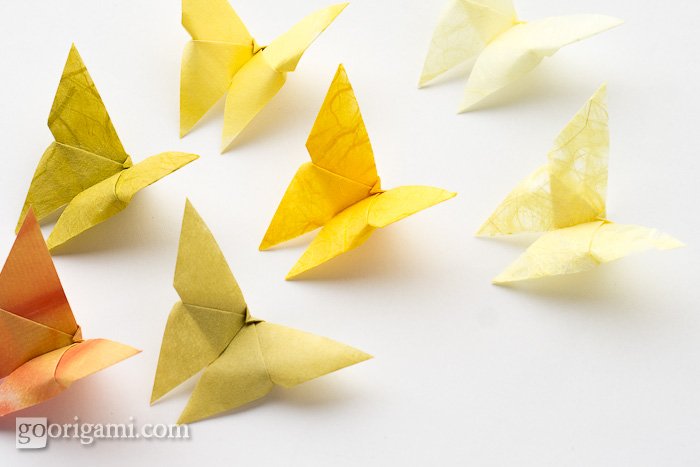
Best Origami Butterfly Ever Instructions Go Origami
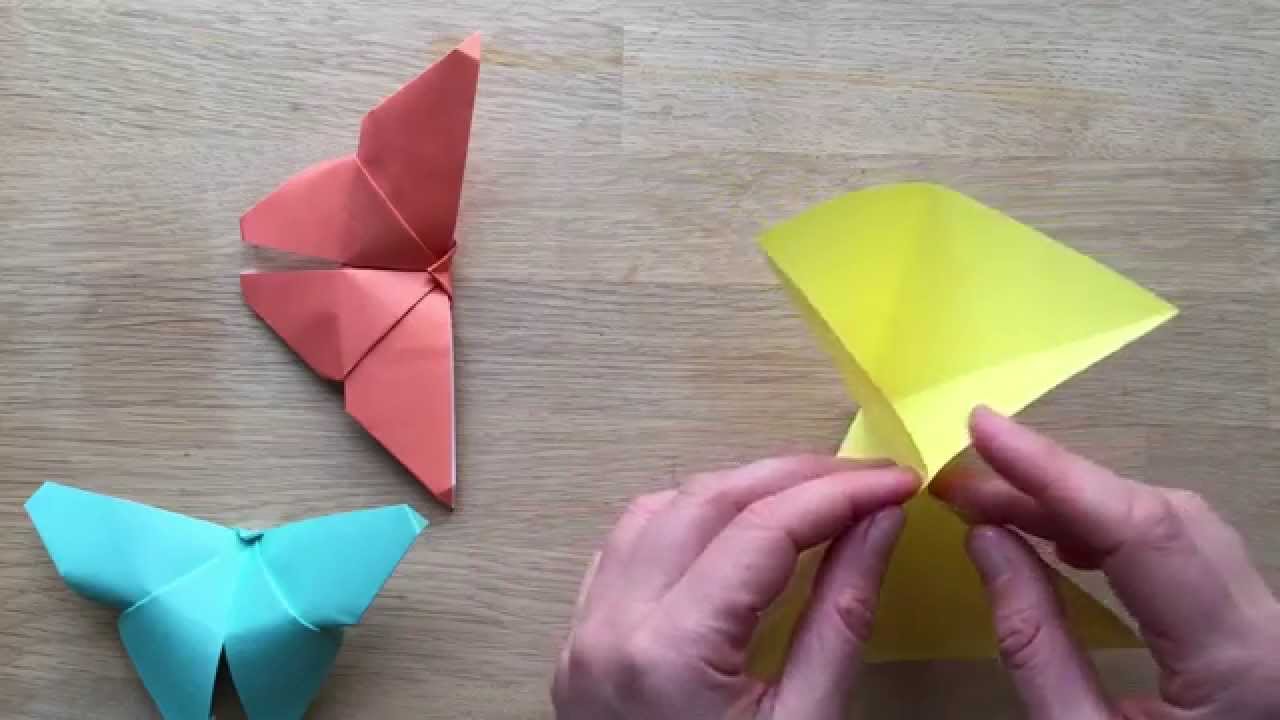
Easy Origami Butterfly Youtube

How To Make An Easy Origami Butterfly In 3 Minutes Youtube

How To Make An Easy Origami Butterfly Gathering Beauty
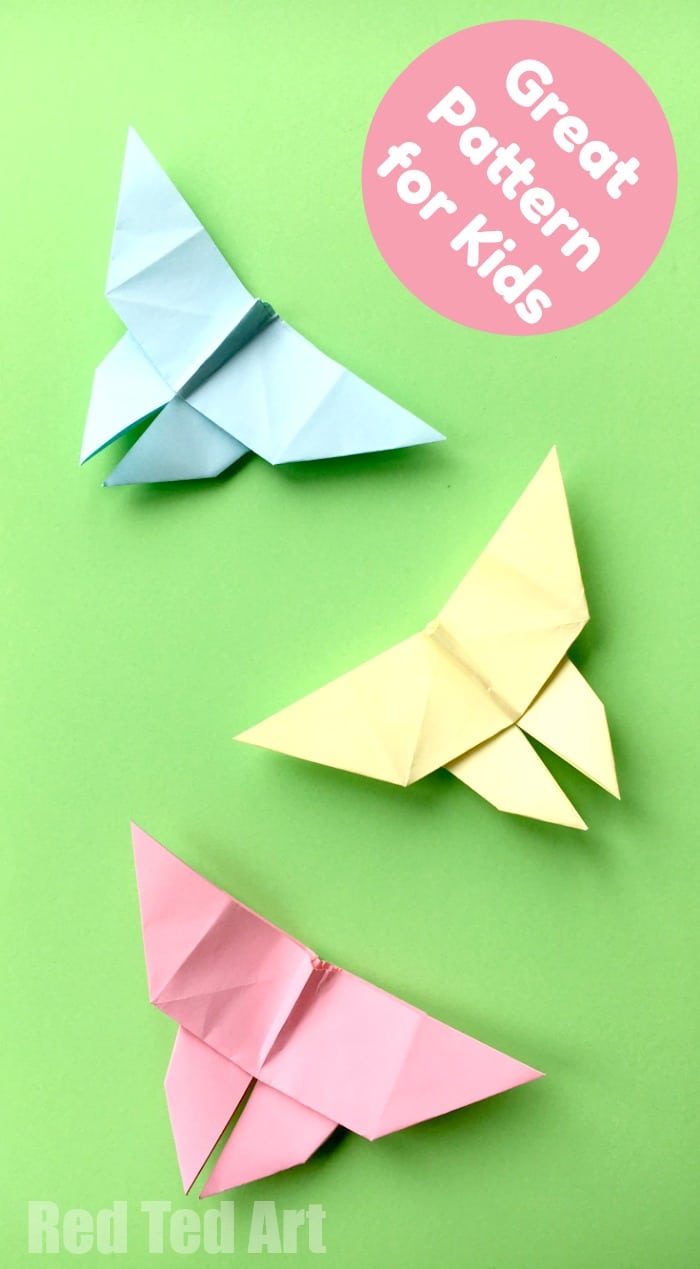
Easy Origami Butterfly Red Ted Art Make Crafting With Kids
Shaping the body 1.
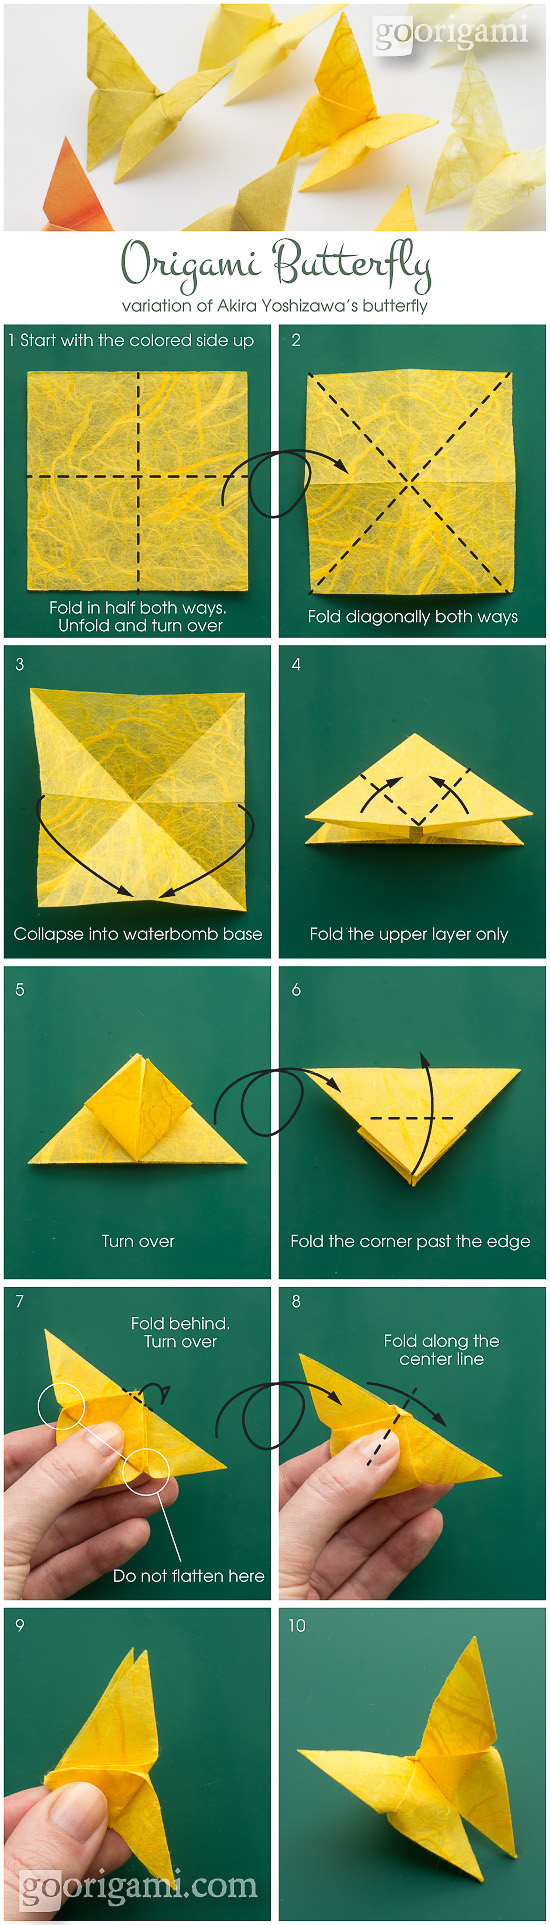
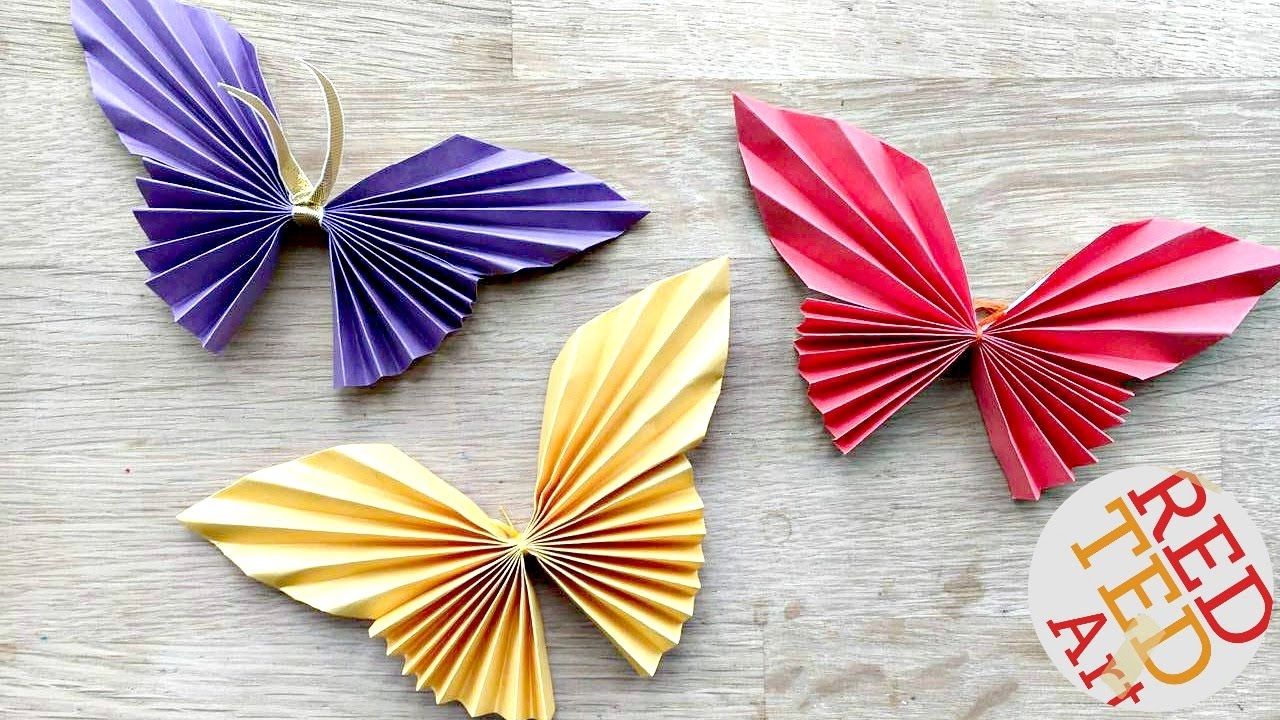
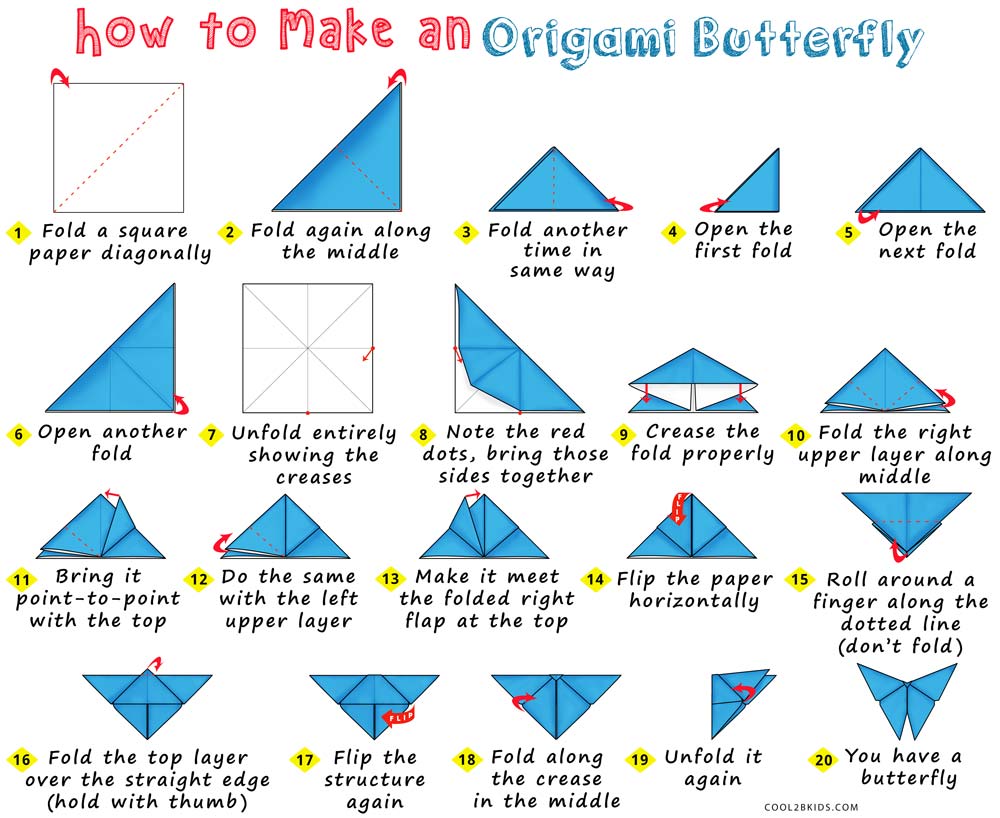
Simple origami butterflies. Flip the model over. Fold it in half horizontally crease it well and then. Cut out a square from a piece of colored card or paper. Turn the square over and fold along the diagonals.
Today we share these simple paper origami butterflies with you. This fun little origami butterfly flaps it s wings. Make a diagonal valley fold in the upper wing. Now the wing tips should be pointing left and the crease you ve just made is face down on the.
For a child 15 x 15 cm 6 x 6 inch paper will be fine. Lift the upper wing which is currently extending straight out to. It is wonderful to see my kids get into some basic origami paper folding crafts they are now 5yrs and 7yrs and just about able to manage. Designed by the late deg farelly this easy origami butterfly toy is a great origami project for kids.
Repeat step 1 for the other upper. Step 2 fold the paper in half vertically crease it well and then unfold it. If you have two sided colored paper start off with your paper white side up to ensure that your butterfly is colored. Do not overdo the folding though.
Turn the square over and fold along one of the diagonals. How to make an easy origami butterfly step 1. Step 3 fold the top quarter of the paper along the dotted line to the centre line. Simple origami butterflies march 31 2015 by madincrafts 4 comments even if you have procrastinated on any and all easter decorations there is still time to make some simple but beautiful origami butterflies.
Interestingly they do well on these paper crafts for different reasons and depending on the item we are making. As you fold the paper make sure your folds are as crisp and clean as possible.

How To Make An Easy Origami Butterfly Gathering Beauty

How To Make An Origami Butterfly Simple Origami Butterfly Easy
Best Origami Butterfly Ever Instructions Go Origami

Make A 3 Minute Origami Butterfly The Kid Should See This

How To Fold An Origami Butterfly Woo Jr Kids Activities
/origami-butterfly-tutorial-00-56a6d66f5f9b58b7d0e50be9.png)
How To Make An Easy Origami Butterfly

How To Make An Easy Origami Butterfly Gathering Beauty

Origami Butterflies How To Make A Paper Butterfly Easy Origami
Easy Paper Butterfly Origami Cute Easy Butterfly Diy Origami
How To Make An Origami Butterfly

Origami Butterflies Lesson Plan Nicha Art Sphere Inc

130 Best Origami Butterflies Images Origami Butterfly Origami

How To Make An Origami Butterfly Bbc Good Food
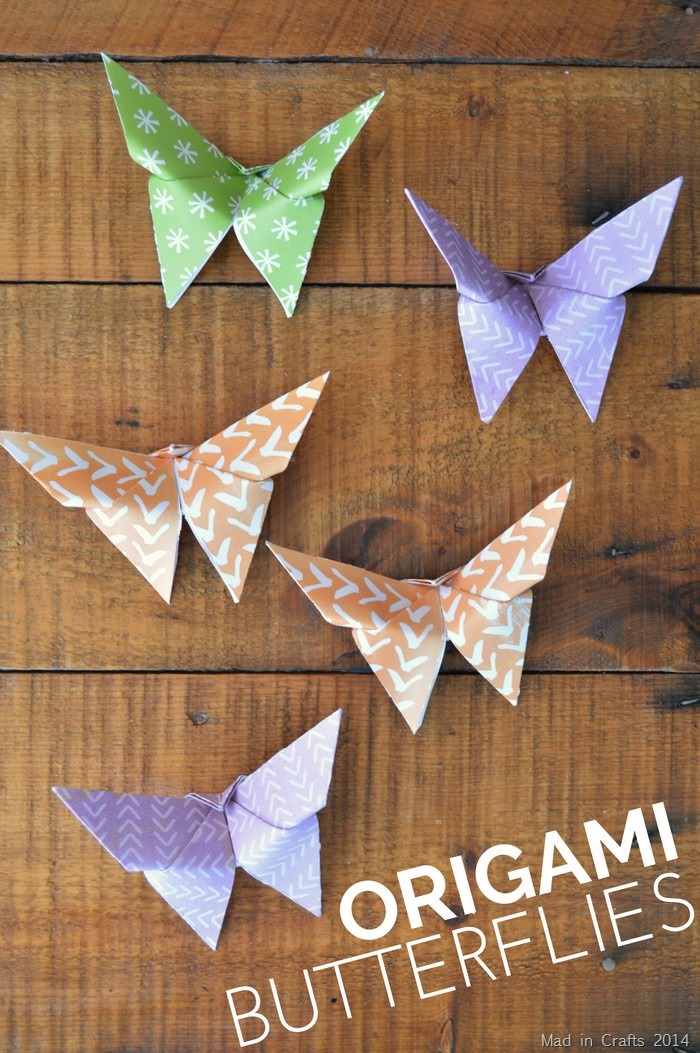
Simple Origami Butterflies Mad In Crafts
